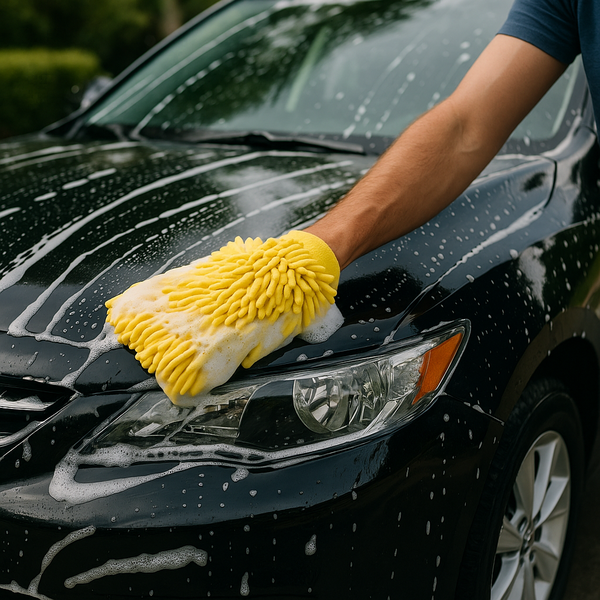
Washing your car might seem like a straightforward chore, but there's a significant difference between a quick rinse and a proper wash that protects your paint and leaves a lasting shine. Using the correct techniques and products is crucial to avoid scratches, swirls, and water spots that can dull your vehicle's appearance over time. Understanding the steps involved ensures your car looks its best while preserving its finish and value.
Gather Your Supplies
Before you even get the hose out, make sure you have everything you need readily available. This prevents you from scrambling mid-wash, which can lead to water spots as sections dry prematurely. You'll need at least two buckets (one for soapy water, one for rinse water), a quality car wash soap designed specifically for automotive paint (avoid dish soap, as it strips wax), a wash mitt or sponge (microfiber or natural lamb's wool are preferred over sponges that can trap grit), a separate wheel cleaning brush or mitt, wheel cleaner (if necessary for stubborn brake dust), and several clean, soft drying towels (microfiber drying towels are highly effective). Having a hose with a spray nozzle is also essential.
Pre-Rinse Thoroughly
The first step is always a thorough pre-rinse. Use your hose to spray down the entire vehicle, starting from the top and working your way down. The goal here is to remove loose dirt, dust, and debris that could scratch the paint during the washing process. Pay extra attention to wheel wells and lower panels where more grit accumulates. A powerful stream can help dislodge caked-on mud before you even touch the car with a wash mitt.
The Two-Bucket Method is Key
This technique is non-negotiable for minimizing swirl marks. Fill one bucket with your car wash soap and water according to the product's instructions. Fill the second bucket with clean water. Dip your wash mitt into the soap bucket, wash a small section of the car (starting from the top), then rinse the dirt and grit from the mitt *thoroughly* in the clean water bucket before dipping it back into the soap bucket. This isolates the dirt in the rinse bucket, preventing you from transferring it back onto the paint and causing scratches. Always work from the top of the car downwards (roof, hood, trunk, sides, lower panels) as this allows the dirty water to flow downwards without re-contaminating areas you've already cleaned.
Wash Section by Section
Work in small sections, keeping the rest of the car wet as you go, especially on warm or sunny days. This prevents soap from drying on the paint, which can leave streaks or spots. Use gentle, back-and-forth or up-and-down motions with your wash mitt, rather than circular motions, which are more likely to create swirl marks. Be methodical and cover every exterior surface, including door jambs, the front grille, and around lights.
Clean the Wheels Last
Wheels are typically the dirtiest part of the car, covered in brake dust and road grime. Clean them *after* the paint but *before* the final rinse of the entire car. Use a separate mitt or brush and wheel cleaner specifically designed for your wheel type (e.g., alloy, chrome, painted). Rinse the wheels thoroughly after cleaning. Cleaning them last prevents splashing dirt onto your freshly washed paintwork.
Rinse Thoroughly (Again)
After you've washed the entire car using the two-bucket method and cleaned the wheels, it's time for a final, thorough rinse. Again, start from the top and work your way down. Use a gentle flow of water (or remove the nozzle completely for a 'sheeting' effect) to rinse away all soap residue. Ensure no suds are left behind in crevices, trim, or around badges, as dried soap can be difficult to remove and can damage plastic or rubber over time.
Drying for a Spotless Finish
Drying is just as important as washing to prevent unsightly water spots, especially if you have hard water. Use clean, high-quality microfiber drying towels. Gently pat or lightly drag the towel across the surface, working from top to bottom. Avoid rubbing, as this can still induce swirl marks. Use multiple towels if necessary – a damp towel won't absorb water effectively. For intricate areas like grilles, mirrors, and door jambs, smaller microfiber towels or even a leaf blower can be useful to chase water out of crevices. Work quickly and in the shade if possible to prevent water spots from forming before you can dry the area.
Optional: Add Protection
Once the car is completely dry, this is the perfect time to apply a spray wax or sealant for added shine and protection until the next wash. This step helps repel dirt and water, making future washes easier and keeping your car looking cleaner for longer.
Following these steps for a proper car wash takes a little more time than a quick rinse, but the results are well worth the effort. You'll not only achieve a much cleaner and shiner car, but you'll also protect your vehicle's paintwork from damage caused by improper washing techniques. Investing in quality supplies and taking the time to wash your car correctly is an investment in maintaining its appearance and preserving its value for years to come. A clean car isn't just about aesthetics; it's about care and maintenance.

