Encountering a flat tire is a common and frustrating part of driving. It always seems to happen at the least convenient time, often leaving you stranded on the side of the road. While it might seem intimidating, knowing how to change a flat tire is an essential skill for any driver. It can save you time, money, and a lot of stress, ensuring you can get back on your journey quickly and safely.
Essential Tools and Safety First
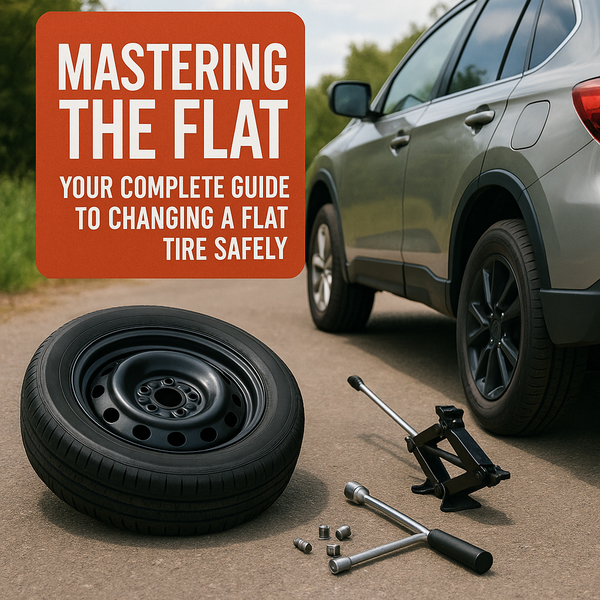
Before you even think about tackling a flat tire, it's crucial to ensure you have the necessary tools and understand the critical safety precautions. Your car should be equipped with a spare tire (either a full-size match or a temporary spare), a jack, a lug wrench, and your vehicle's owner's manual. You'll also need a safe location to perform the change. Pull over as far as possible onto a level, stable surface away from traffic. If you're on a busy road, try to find an exit or a safe parking area. Activate your hazard lights immediately to alert other drivers to your presence. Using reflective triangles or flares, if you have them, positioned behind your vehicle can also significantly increase your visibility, especially at night or in poor weather conditions. Always engage your parking brake firmly to prevent the car from rolling while it's on the jack. If possible, block the tires that are not flat with wedges or large rocks for added stability. Remember, your safety is paramount; never attempt to change a tire in a location where you feel unsafe or traffic is too close.
Step-by-Step Guide to Changing Your Tire
Once you're in a safe location and have gathered your tools, you can begin the process. The first step is to locate your spare tire, jack, and lug wrench, usually stored in the trunk under the mat or sometimes mounted underneath the vehicle. Consult your owner's manual for their exact location and how to access them.
Loosen the Lug Nuts
Before lifting the vehicle, use the lug wrench to slightly loosen the lug nuts on the flat tire. Lug nuts are the bolts that hold the wheel onto the hub. Turn them counter-clockwise. They might be quite tight, so you may need to use some force. Only loosen them about a quarter to half a turn – do not remove them yet. Doing this while the tire is still firmly on the ground helps prevent the wheel from spinning.
Position the Jack
Refer to your owner's manual to find the correct jacking point for your vehicle. Improper jacking can damage your car's frame or body. The jacking point is typically a reinforced part of the frame near the flat tire. Place the jack securely under the designated point. Ensure the jack is on a stable, flat surface. Avoid placing it on uneven ground or soft asphalt.
Raise the Vehicle
Begin to crank the jack slowly and steadily to lift the vehicle. Raise it just high enough so the flat tire is completely off the ground. You need enough clearance to remove the flat tire and install the inflated spare. Avoid raising the vehicle higher than necessary, as this can decrease stability.
Remove the Lug Nuts and Flat Tire
Now that the tire is off the ground, you can fully unscrew the lug nuts you previously loosened. Keep the lug nuts together in a safe place, like your pocket or the hubcap (if you removed one), so you don't lose them. Once all the lug nuts are removed, grasp the flat tire with both hands and pull it straight towards you to remove it from the wheel studs. It might require a firm tug. Place the flat tire on its side nearby, out of the way.
Mount the Spare Tire
Take your spare tire and align its rim with the wheel studs. Push the spare tire firmly onto the studs until it sits flush against the hub. Hold the spare tire in place and start replacing the lug nuts by hand. Screw them on as tightly as you can by hand, ensuring they are snug.
Lower the Vehicle
Slowly lower the vehicle using the jack until the spare tire touches the ground but the full weight of the car is not yet resting on it. Now, use the lug wrench to tighten the lug nuts further. Tighten them in a star or criss-cross pattern rather than tightening them sequentially. This ensures the wheel is mounted evenly and securely against the hub. Tighten them as much as you can with the wrench.
Fully Lower the Vehicle and Final Tightening
Completely lower the vehicle until it is resting fully on the ground. Now, give the lug nuts a final tightening with the lug wrench, again using the star pattern. Apply significant force to ensure they are properly secured. It's a good idea to double-check them after driving a short distance (like 50-100 miles) as they can sometimes loosen slightly.
After the Change: Next Steps and Considerations
You've successfully changed your flat tire! However, your job isn't quite finished. Store the flat tire, jack, and lug wrench securely in your vehicle. Remember that temporary spare tires are not designed for long distances or high speeds. They have limitations on speed (usually around 50 mph or 80 km/h) and mileage. Your owner's manual will specify the exact restrictions for your spare.
Your next step should be to get the flat tire repaired or replaced as soon as possible. Visit a tire service center or mechanic at your earliest convenience. They can assess if the flat tire can be repaired or if you need a new one. They can also check the pressure in your spare tire (they are often under-inflated when stored) and ensure your lug nuts are torqued to the correct specification using a torque wrench, which provides a more precise tightening than a lug wrench.
Common Mistakes to Avoid
Avoiding common errors is just as important as following the correct steps. Never get under the vehicle while it is only supported by a jack; a jack is designed for lifting, not for holding a vehicle's weight for extended periods or with people underneath it. Ensure the jack is placed on a solid, level surface. Forgetting to set the parking brake or block the wheels can lead to the vehicle rolling off the jack, which is incredibly dangerous. Over-tightening lug nuts can strip the bolts, while under-tightening can cause the wheel to loosen while driving. Always follow the correct loosening and tightening sequence.
Maintaining Your Tires to Prevent Flats
Preventing flats is always better than fixing them. Regularly check your tire pressure, including the spare tire. Under-inflated tires are more susceptible to punctures and blowouts. Inspect your tires periodically for signs of wear and tear, such as low tread depth, cracks in the sidewall, or embedded objects like nails or glass. Rotate your tires according to your vehicle's maintenance schedule to ensure even wear. Being proactive with tire maintenance significantly reduces your chances of experiencing a flat tire unexpectedly.
Changing a flat tire might seem daunting at first, but with the right tools, knowledge, and a calm approach, it's a task you can confidently handle. Practice the steps in your mind, ensure your tools are accessible, and always prioritize safety. Being prepared means you won't be caught off guard the next time you encounter that unwelcome hiss of air leaving your tire.